I wanted to play with Stable Diffusion "in the cloud" and see what that process is like compared to running on real hardware.
After some Googling I came across vast.ai (disclaimer: that's a referral link) which seems to be one of the cheaper and popular Cloud GPU VM providers perfect for running Stable Diffusion on. It seems that instead of giving you a "VM" they run a Docker image for you, which might already be pre-setup (they have a few options available) or you can do your own thing.
Signing up is easy, you're emailed a verification link, and need to credit your account to start - the minimum amount seems to be $5 but at least it's paid for in advance with no scary bills at the end of the month if you forget to delete VMs.
Creating the "VM"
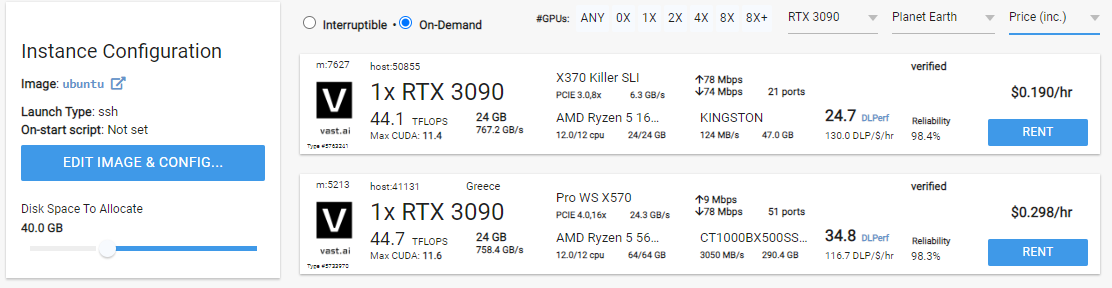
On the left of the "Create" screen, increase disk space to 40 GB and click Edit Image & Config
Where it says
Docker create/run options ex: -e TZ=UTC -p 8081:8081 -e JUPYTER_DIR=/
Make sure you enter:
-p 9090:9090
(this is the portal InvokeAI's web ui listens on, which we need accessible from the outside - it will be mapped to a different port number on the VM later!)
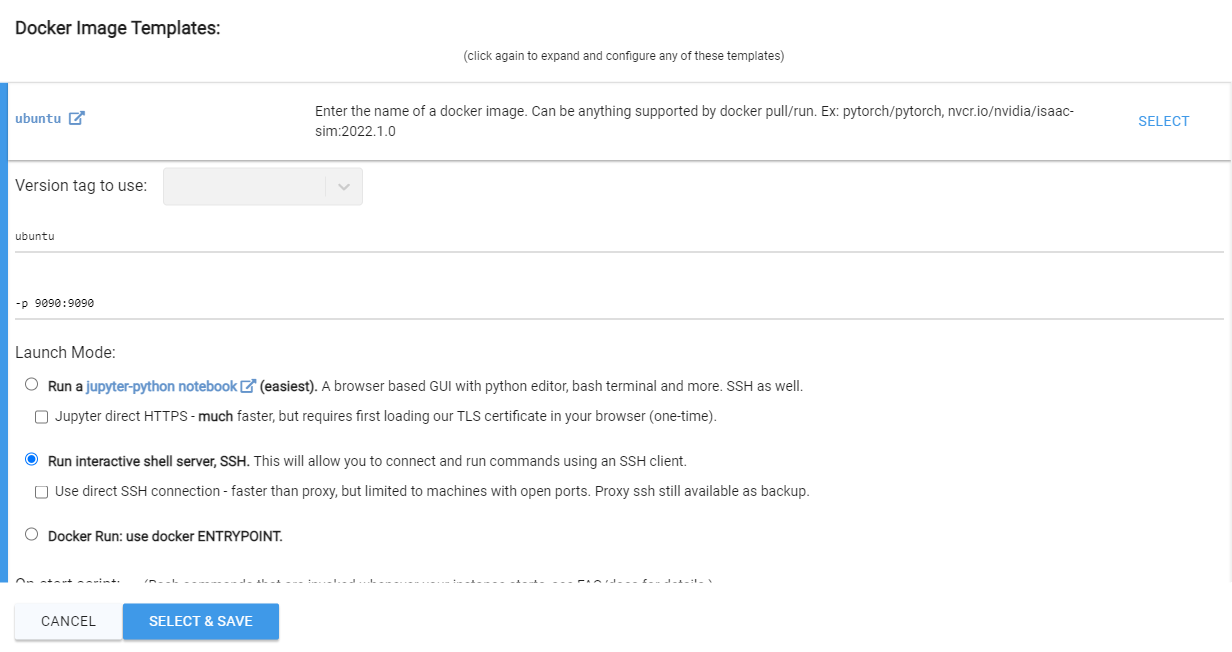
Make sure Run interactive shell server, SSH is selected.
Select an image type - On Demand means it should be uninterrupted (vs Interruptible which is cheaper but resources go to the highest bidder). My testing was done on instances with a single RTX 3090 card with 24GB GPU RAM. Pay attention to the Internet Upload and Download speeds - these seem to vary from 750Mbps to 75Mbps.
Click Rent when you've found your instance type and visit the "Instances" tab to see when it's created.

A few times I've gotten an error message (on the "Instances" page):
Status: Error response from daemon: Error processing tar file(exit status 1): open /ghcr.io_ebr_invokeai_latest-cuda: no space left on device
In that case I just delete the image and "Rent" another one (your Docker/ssh/disk settings should still be saved).
Accessing the VM
Assuming you selected Run interactive shell server, SSH, once the VM is created the "Instances" page should give a blue Connect button. If you haven't already done so, you'll need to provide an SSH public key.
This should give you the ssh command to run to access the server.
In my case:
ssh -i ~/.ssh/vastai -p 38332 [email protected]
You land up in TMux which I am not that familiar with, and greeted with a prompt:
Welcome to your vast.ai container! This session is running in `tmux`.
To disconnect without closing your processes, press ctrl+b, release, then d.
To disable auto-tmux, run `touch ~/.no_auto_tmux` and reconnect. See also https://tmuxcheatsheet.com/
Running Stable Diffusion "manually"
There are several tutorials on getting Stable Diffusion running, I used my friend Constant's post - changing Windows paths for Linux paths.
But first we need to install Python 3 - and nano because it's better than emacs/vim ;)
apt update && apt install -y python3 python3-pip nano
Follow his steps:
pip install diffusers transformers
pip install torch==1.12.1+cu116 -f https://download.pytorch.org/whl/torch_stable.html

mkdir stablediffusion
cd stablediffusion

nano stablediffusion.py
Paste his code in - remembering to replace YOUR_ACCESS_TOKEN with your HuggingFace token.
Running it, eg: python3 stablediffusion.py a photo of a cat drinking coffee, will take a little while as the relevant files are downloaded for the first time.
I got an error that sample isn't a valid dictionary key (KeyError: 'sample') - it seems something's changed since Constant's blog post and the fix is to change this line:
image = pipe(prompt, guidance_scale=7.5)["sample"][0]
to:
image = pipe(prompt, guidance_scale=7.5).images[0]
This should fix things, causing images to generate (in the current directory) until you hit CTRL+C.
I get a message that recommends installing "accelerate" - so let's blindly do that
pip install accelerate
Now the message goes away :P
This leaves our images stuck in an SSH session where we can't see them - I opted for using rsync to download the images to my local machine, this way only newer images are downloaded rather than having to manually select which to download or downloading the whole directory every time (eg: if I used scp).
The command looks something like:
rsync -Pav -e "ssh -i ~/.ssh/vastai -p 38332" [email protected]:/root/stablediffusion .
Phew! Stable Diffusion images generating in the cloud and downloading - the above rsync command can be run every time new images are generated.
Using InvokeAI
Alternatively we can use InvokeAI which provides a web interface with a bunch of features.
As above we'll need to install Python and get a HuggingFace access token.
apt update && apt install -y python3 python3-pip nano
alias python=python3
Following their installation instructions (using our existing, or a new, Ubuntu docker image in Vast AI with port 9090 being forwarded):
git clone https://github.com/invoke-ai/InvokeAI.git
cd InvokeAI
python -m venv invokeai
At this point you'll likely get an error about needing to install venv (your python/package version may differ!)
apt install -y python3.10-venv
Then repeating that command and continuing with their installation instructions:
python -m venv invokeai
source invokeai/bin/activate
python -m ensurepip --upgrade
python -m pip install --upgrade pip

ln -sf environments-and-requirements/requirements-lin-cuda.txt requirements.txt
pip install --prefer-binary -r requirements.txt # this will take quite a while
The remaining steps resulted in an error for me, saying ImportError: libGL.so.1: cannot open shared object file: No such file or directory - which can be solved/prevented by doing:
apt-get install -y libgl1
Then finish the install with:
configure_invokeai.py # this will also take quite a while!
You will be asked some questions which you should be able to just use defaults for - you will need your HuggingFace access token here as well (see Constant's post).
And finally run it... fully exposed to the whole internet without auth - what could go wrong?
invoke.py --web --host 0.0.0.0
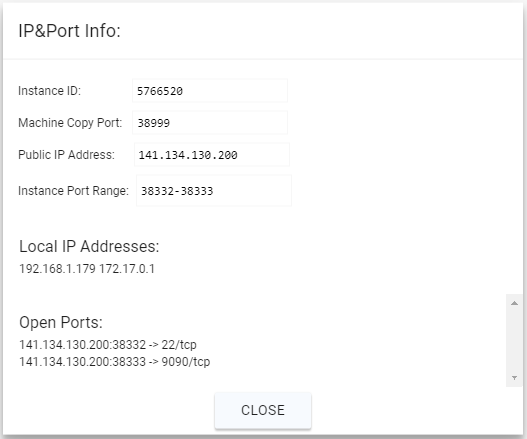
Back in the vast.ai site, under "Instances", clicking the IP and port range bar at the top will show the connection options:
The port 9090 we passed in as Docker params, which InvokeAI's web ui is now listening on, is available on http://141.134.130.200:38333 :
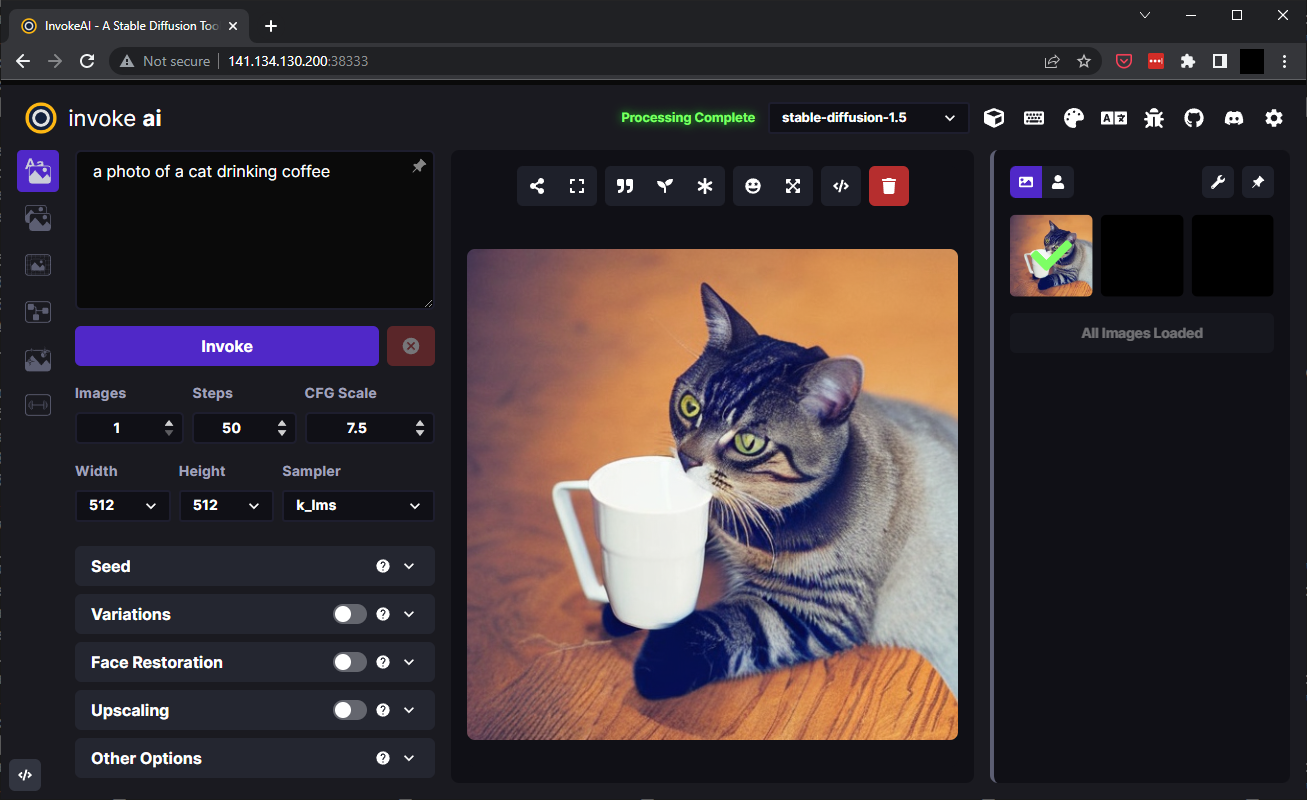
If everything seems to be running properly but images aren't working, try changing the modle (drop down above the image area) to stable-diffusion-1.5.
This isn't a complete, ideal, setup... there are improvements that can be done like Installing PyPatchMatch for better "inpainting".
Shutting down
Don't forget to delete the VM when you're done, to avoid spending all your vast.ai credits. It seems the shutdown command can't be used from the CLI so you'll have to use the site.
This does mean next time you'll have to repeat all of the above steps... unless most of the above is done offline to create a custom docker image, which can then be pushed somewhere and re-used instead of the base ubuntu image :)